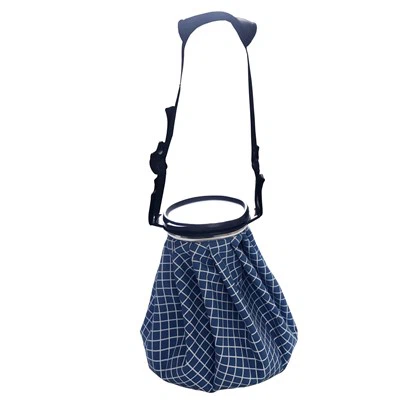
Priming a blue enema bag is a crucial step before using it for its intended purpose. As a supplier of Blue Enema Bag, I understand the importance of providing clear and accurate information on how to prime this essential medical device. In this blog post, I will guide you through the process of priming a blue enema bag, ensuring that you can use it safely and effectively.
Understanding the Blue Enema Bag
Before we delve into the priming process, it's essential to understand what a blue enema bag is and its components. A blue enema bag is a medical device used to administer an enema, which is a procedure that involves introducing fluid into the rectum and colon to stimulate bowel movements or clean the lower intestines. The blue enema bag typically consists of a bag made of a durable, flexible material, a tubing set, and a nozzle or tip.
Why Priming is Necessary
Priming the blue enema bag is necessary for several reasons. Firstly, it helps to remove any air bubbles from the tubing and bag. Air bubbles can cause discomfort or pain when they are introduced into the rectum, and they can also affect the accuracy of the fluid volume being administered. Secondly, priming ensures that the fluid flows smoothly through the tubing and nozzle, preventing any blockages or interruptions during the enema procedure. Finally, priming allows you to check the functionality of the enema bag and tubing, ensuring that there are no leaks or defects.
Step-by-Step Guide to Priming a Blue Enema Bag
Now that we understand the importance of priming, let's go through the step-by-step process of priming a blue enema bag.
Step 1: Gather Your Supplies
Before you begin priming the blue enema bag, gather all the necessary supplies. You will need the blue enema bag, the tubing set, the nozzle or tip, a container of warm water, and a towel or cloth to clean up any spills.
Step 2: Prepare the Enema Bag
Start by filling the blue enema bag with the appropriate amount of warm water. The amount of water you use will depend on the purpose of the enema and the instructions provided by your healthcare provider. It's important to use warm water, as cold water can cause discomfort and cramping.
Step 3: Attach the Tubing Set
Once the enema bag is filled with water, attach the tubing set to the bag. Make sure that the connection is secure and that there are no leaks. Some enema bags come with a clamp on the tubing, which you can use to control the flow of fluid.
Step 4: Prime the Tubing
To prime the tubing, hold the nozzle or tip over a sink or container and open the clamp on the tubing. Allow the water to flow through the tubing until all the air bubbles are removed. You may need to gently squeeze the enema bag to help the water flow through the tubing. Once the tubing is primed, close the clamp to stop the flow of water.


Step 5: Check for Leaks
After priming the tubing, check for any leaks in the enema bag or tubing. Look for any signs of water dripping or seeping from the connections or seams. If you notice any leaks, tighten the connections or replace the tubing set if necessary.
Step 6: Attach the Nozzle or Tip
Once you have checked for leaks, attach the nozzle or tip to the end of the tubing. Make sure that the connection is secure and that there are no leaks. Some enema bags come with a lubricant or gel to help ease the insertion of the nozzle or tip into the rectum.
Step 7: Prepare for Use
Before using the enema bag, make sure that you are in a comfortable and private location. You may want to lie down on your left side with your knees bent to help relax the muscles in your rectum and colon. Place a towel or cloth under your buttocks to catch any spills.
Step 8: Administer the Enema
To administer the enema, slowly and gently insert the nozzle or tip into the rectum. Make sure that the nozzle or tip is inserted straight and that it does not cause any pain or discomfort. Once the nozzle or tip is inserted, open the clamp on the tubing and allow the water to flow into the rectum. You may need to adjust the flow rate by squeezing the enema bag or adjusting the clamp on the tubing.
Step 9: Hold the Fluid
Once the enema bag is empty, remove the nozzle or tip from the rectum and lie still for a few minutes to allow the fluid to work. You may feel the urge to have a bowel movement, but it's important to hold the fluid in for as long as possible to allow it to clean the lower intestines.
Step 10: Clean Up
After the enema procedure is complete, clean up the enema bag and tubing. Empty any remaining water from the enema bag and rinse it thoroughly with warm water. You can also use a mild soap or detergent to clean the enema bag and tubing. Make sure that the enema bag and tubing are completely dry before storing them.
Tips for Priming a Blue Enema Bag
Here are some additional tips to help you prime a blue enema bag safely and effectively:
- Use warm water: As mentioned earlier, it's important to use warm water when priming the enema bag. Cold water can cause discomfort and cramping, while hot water can cause burns or damage to the enema bag and tubing.
- Follow the instructions: Make sure that you read and follow the instructions provided with the enema bag carefully. Different enema bags may have different priming procedures, so it's important to follow the specific instructions for your enema bag.
- Be gentle: When priming the tubing and inserting the nozzle or tip into the rectum, be gentle to avoid causing any pain or discomfort. If you experience any pain or discomfort, stop the procedure immediately and consult your healthcare provider.
- Check the expiration date: Before using the enema bag, check the expiration date to make sure that it is still safe to use. Expired enema bags may not work properly or may pose a risk of infection.
- Store the enema bag properly: After using the enema bag, store it in a cool, dry place away from direct sunlight. Make sure that the enema bag and tubing are completely dry before storing them to prevent the growth of bacteria or mold.
Other Enema Products
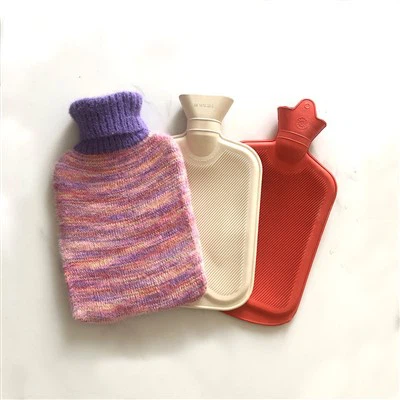
In addition to the Blue Enema Bag, we also offer other enema products, such as the Hot Water Bottle With Enema Attachment and the Clean Enema Kit. These products are designed to provide a convenient and effective way to administer an enema at home.
Contact Us for Procurement
If you are interested in purchasing our blue enema bags or other enema products, please contact us for more information. We offer competitive prices, high-quality products, and excellent customer service. Our team of experts is available to answer any questions you may have and to help you choose the right enema product for your needs.
References
- American Academy of Family Physicians. (2021). Enemas. Retrieved from https://www.aafp.org/afp/2000/0115/p277.html
- Mayo Clinic. (2021). Enema: Uses, types, and safety. Retrieved from https://www.mayoclinic.org/tests-procedures/enema/about/pac-20384642
- WebMD. (2021). Enemas: What you need to know. Retrieved from https://www.webmd.com/digestive-disorders/enemas-what-you-need-to-know